Showing posts with label diy. Show all posts

Sunday, June 8, 2014

little spoon sunburst mirror

Awhile back, I made a sunburst mirror out of recycled bits and silver spoons from the thrift store. My mom liked it so much that she specially requested one of her own, but smaller.

Well, it took me awhile to dig up enough baby and souvenir spoons at junk stores and yard sales, but I finally did it, just in time for her birthday this year!


It's a quick project once you have the materials. The mirror is a plastic-backed utility mirror I found at Bring, and I admit that I just hot-glued the sixteen little spoons directly to the back. Those that had dangly bits or handles that were too long or two wide were cut with tin snips first. Oh! And I alternated fronts and backs for some added interest.


I had a partial sheet of adhesive felt furniture pad that makes a good backing. It's thick, so the spoons won't be sitting directly on the wall, and soft so nothing scrapes. The hanger is made from a plastic coated paper clip sunk into the felt with the ends bent back on the other side. And then, for security, more hot glue holds everything in place.

I don't usually use hot glue so liberally in projects, but there was no place on this mirror to rivet or wire the spoons in place. In situations like this (small, light projects without an extended base) it's a good choice that'll last a nice, long time.

Happy birthday, Mom! Love you a bunch.


Wednesday, April 30, 2014

arrows on the wall

Dropping in with a quick little tip you might find useful: hanging arrows on the wall with simple hardware!


These clips are usually used for fastening cables to interior and exterior walls; I've shown them to you before when I hung my lights in the living room, I think.


They also work wonderfully well for hanging arrows directly on the wall.


I measured down from the ceiling to make sure to keep these level with each other, then just used the clips to nail them directly in place.

That's all there is to it. Maybe this will come in useful at your place? Thanks for reading!

p.s. wall art is by Nikki McClure

Linking up to:
The Cottage Market

Saturday, April 26, 2014

a simple baby shower favor for nesting mamas

I'm going to keep this one short and sweet: bird's nest baby shower favors! Stock up on a couple of things after Easter, and you'll be able to make a whole grouping of nests for guests.


You'll need:

• edible Easter grass (made from potato starch; it doesn't taste very good. I found mine at Target.)
• speckled candy eggs
• parchment paper
• cellophane bags
• cardstock
• vintage-style labels (I like these)
• stapler + staples
• scissors
• pen


How to:

Take each bag of edible Easter grass and separate it carefully into five sections, one for each nest. Shape a round nest on a square of parchment that will fit inside a cellophane bag. After slipping your nest + parchment into the bag, pile six or seven candy eggs into the nest. Cut and staple cardstock tags over the folded bag tops, then cover front staples with a vintage label. I put the word "nesting" on the front, and on the back, "candy eggs * edible nest" as a little fyi.


These turned out so cute, I know I'll be using them for future showers as well! Thanks for stopping by to check out this sweet little project.

Tuesday, April 8, 2014

industrial file cabinet makeover (part one)

Don't avert your eyes; you'll hurt its feelings.


We were in pretty urgent need of a four-drawer filing cabinet for organizing papers and craft supplies, but I had some standards that needed to be met:

1) Must be under 18 inches deep. This was a hard one, as many of the filing cabinets I was scouting out were quite a bit deeper, and I just don't have that kind of space right now.

2) Must be steel. (That wood pattern you see there isn't wood; it's a wood patterned paint on metal drawers. In person, it's really easy to tell the difference.) Steel has the advantage of being lighter than wood (at least, with modern steel construction) and won't let me down by turning out to be made of veneered particle board. Also, modern steel filing cabinets are pretty easy to find at thrift stores; the more modern, the less likely to have lead paint.


3) Must either have a key or have an unlocked top drawer. I passed on a giant antique three-door filing cabinet because the top drawer was locked and I knew it would be a large additional cost to get the lock drilled out. And who knows what was in the top! Could be old papers, could be dead raccoon. Never mind that the cabinet in question met neither of the previous specifications. It was gorgeous blue and had really lovely handles. But the locked cabinet drawer was a deal-breaker for $150.

I spotted this cabinet at St. Vincent de Paul on a day when yellow price tags were 25% off. After discount, I paid $11.24 for it. It met all of the above specifications, with the downside being that it's not a showpiece. I absolutely can't stand the handles.


So, I never intended to leave it as-is. I wanted something more like one of the cabinets I've pinned to my File Cabinets Pinterest board: protected bare metal, nicer hardware, with a style more vintage-industrial than 1980s-office. Sadly, I'm completely priced out of that market. Completely. I'm in more of a $50-filing-cabinet tax bracket.

Okay: so, for the first step, I brought the thing home, removed the drawers, and dug some green paint stripper out of the shed.

I was pretty optimistic after an hour, as the paint on the back was very bubbly and then scraped right off without a tantrum. I'd only used the green paint stripper on wood before (and been frustrated by the lack of results), so I was all excited about how well the rest of the cabinet would go.

You can see the back here, mostly paint-less, and the top, still painty and scabby even after giving the paint stripper another few hours to sit. (I would have let it sit overnight, but for the rain.)


The front and sides fared about the same.


This was a pretty big letdown after how easy the back was. A second run with a different brand of stripper didn't do much but make a mess and waste money.


The palm sander started out not making very good progress, but did better once I'd attached a 35-grit paper and really went at it. It was a lengthy, messy, NOISY undertaking. Sometimes you know a project is done because it's better than you could have imagined. Sometimes you know it's done because no one can listen to even one more minute of the sander vibrating a piece of sheet metal.

After sanding, I buffed it with a coat of automotive wax to protect the finish.

Here is the cabinet as it will stay, with a bit of black left, emphasizing the vintage look (I think it will do nicely).


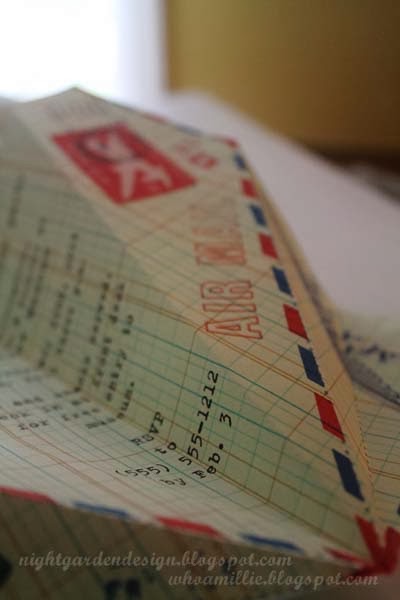
And here is a sneak peek of what's yet to come:


If getting paint off of these cabinets wasn't such a major pita, I'd have a couple of sets of lockers in my carport stripped already. Wanna know something exciting? We've bought a sandblasting kit! I haven't tried it out yet, but I'm really looking forward to seeing how much faster and easier this project is with that tool in hand.

I'll be back soon with part two of this vintage industrial file cabinet makeover, when things really start coming together. Thanks for reading! 

Monday, April 7, 2014

mini art kit

A recent car trip highlighted the need to have various distractions for the kiddo in my bag at all times. I wanted a stash of compact little things to fit in there that won't add too much extra bulk, but will keep him entertained in a restaurant, in the back seat, or in a yurt during an overly rainy overnight trip to the beach. Not that I'm speaking from experience or anything.


An empty mint tin is a great way to organize a few art supplies, including a couple of those crayons that restaurants sometimes give out.

I also added a couple of short colored pencils, some neon posterboard cut to size, and a sheet of stickers sent to me as part of an advertisement. (Kids magazines sometimes send them out to tempt us to subscribe.)


When cutting the posterboard, I made sure to leave an inch of space at the end and a textured edge to make it easier to remove from the box.


And there is is! A mini art kit perfect for stashing in your bag, next to a Hot Wheels car and a travel-sized packet of Play Doh.

I know it's really the Boy Scout motto, but I think I'm going to adopt "Be Prepared" as my own.

Thanks for reading!

Tuesday, March 18, 2014

the cat in the hat mini hats

A couple of factors played into the lack of activity at the blog over the past couple of weeks. First, I was scrambling to finish up the last few costume projects before our preschool's all-parent production of The Cat in the Hat. A few late nights, some scavenging for materials, and a couple of re-dos later, and everything came together. It was a pretty amazing group of people who came together on the project.

Second, my computer died. Like, completely. I took it in with a blank white screen with only a gray apple in the middle, and when it came back to me a little over a week later, they'd replaced the hard drive and the logic board. Thankfully, luckily, magically, there was a week left on the AppleCare extended warranty the Mr. had the foresight to buy. A week later, and we'd have been paying out-of-pocket for the parts and repairs. And it would have cost about as much as I earned on Etsy this year. I feel really lucky.

Anyway, on to today's post.


Let's look at making some Cat in the Hat mini hat headbands!

You can use this idea for making any kind of mini top hat, really, just by changing the color of the stiffened felt and adding some embellishments. Here's what you need to know.

Materials for two hats:

1 12 x 18-inch piece of stiffened felt (also called Friendly Felt) in white or glittered white
2 9 x 12-inch pieces of regular red felt or glittered red felt
red and white thread
hot glue
2 red ribbon-covered headbands


For each hat, cut a piece of stiffened white felt that's 4 1/2 x 12 inches, and three red stripes that are approximately 1 x 12 inches. You'll also need a red circle that measures approximately 3-inches in diameter, and two stiffened white circles (not one red + one white, as photographed) measuring approximately 4 1/2 inches in diameter.

Arrange stripes as shown, then stitch in place using red thread.

Using the red circle as a guide, pin the striped felt into a tube that will use the red circle as a top. You can either pin it inside out to machine stitch and turn carefully right side out again, or you can pin right side out and hand stitch using a mattress or a slip stitch. Both ways will work.
 
After pressing that seam to make sure the tube retains its round shape, sew the red circle to the top using red thread to whip stitch it in place.


Center the hat's top on one of the white circles, then use red thread to whip stitch it in place.

Hot glue the hat to a headband, then cut slots on either end of the remaining white circle to accommodate the head band (as photographed).


Line the circle up with the underside of the hat and the headband, then hot glue in place. Make sure to use lots of glue on the headband, and a scant amount of glue on the white felt so that it doesn't leak through. Then whip stitch to the hat and you're done!

Use similar materials for Mad Hatter or steam punk style hats! Switch to black or brown felt and headbands, and add feathers, ribbons, and other embellishments. And then send me a link so I can see what you've made!

Thanks for reading!

p.s. you can make these photos larger by clicking on them for more detail!

Thursday, February 6, 2014

paper airplane party invitations


Printed on vintage accounting ledger paper.

Airmail graphics for label and stamp are from The Graphics Fairy, and were printed separately on label paper and attached to the airplanes like stamps. ("6 cents" was changed to "4 cents" in Photoshop.)

Postmark is a combination of several glyphs from a font called Dead Letter Office available free from daFont, altered in Photoshop.

Text typeset in Helvetica (all caps, outlined) and Trixie.

I had brainstormed ideas for invitations for my kiddo's Flying Machines party and came up with the idea of a paper airplane invitation that looked like Air Mail. A quick search revealed that it's not a unique idea. Boo hiss. I used this design from Country Living Magazine as a template for my planes, although the result is pretty different.

If you like these but don't want to invest the time to create your own, please e-mail me. I can create a version with your child's name and party details for a reasonable rate, with a 3-day turn-around.

Thanks for reading!


Saturday, January 18, 2014

harmony house credenza


Confession: I bought this Harmony House credenza a year and a half ago. I was so excited, too. It was covered in water rings, had damaged and missing veneer, was splattered with pink nail polish, and needed repair. It was only $9.99 at Value Village and I had a 20% off coupon, making it an incredible steal. Even more incredible now that their furniture prices have gone up.


I was at the register paying for it while a guy was circling it in the furniture area. If I'd been five minutes slower, it would have gone to bidder number two. As it was, he jealously watched the salesperson put a "sold" tag on it and mentioned to me that it was a nice piece, but needed a drawer repair. "I know," I said, "thanks!" I recently spied it's twin on eBay for $575, though in perfect condition.


My goal was to restore it to its former state and resell it, but the original legs were missing. I searched out new legs for it at BRING, found four that almost matched for $1 apiece, and decided that they'd fit the bill. (I'd eventually need to cut off the brass capped ends to make the lengths match. It seriously pained me to do it, but couldn't be helped.)


I poked their threaded rod through a cardboard box to stand them up and start the stripping process.


The messed up drawers and top got stripped at the same time, first with green stripping gel, then with a sanding sponge.


The back of the top had lost its veneer, exposing the particle board (!!!) used for the top, so I ironed on and trimmed some new veneer along the back.


I also had to re-nail the masonite board to the back using little penny nails.


Finally, I started the staining process.


First coat.


The sides had too much damage to the veneer, and sanding too much more would have utterly destroyed it. I took a deep breath and decided to paint the sides and front frame with grey chalk paint.


Here's a nice angle of the freshly finished top.


This shows the stained veneer strip matching up decently to the rest of the edging, the re-nailed back, and the painted side.


Water-ring free top!


The brass hardware needed to be cleaned and refinished.


I don't recommend soaking in the salt/lemon juice mixture recommended on some blogs. All my brass plating sloughed off unevenly.


I used Rub n' Buff to recolor it until I can afford electroplating.


A little bit of sanding at the edges for texture, and some dark colored wax over the finish on the sides.


Finished, with legs reattached!


This is the first time I've refinished a piece this large, and I really like how it turned out. In the end, I moved it into my house rather than trying to resell it. I assume the painted sides, refinished hardware, and inexpert drawer repair make it less valuable (although certainly more attractive than the "before" photo).


Also, now that I know the top is made of particle board, I wouldn't feel right listing it as simply "wood" as the owner of the $575 eBay version does. I mean, technically, that's correct, but I'd expect it to be a plank, not sawdust + glue covered with beautiful veneer. Apparently, this is standard practice in the industry, but if I were the buyer, I'd be pretty surprised to make that kind of a discovery for nearly six-hundred dollars.


Counting the price for the credenza plus the legs, stain, stripper, and sanding sponges, I think I have about $50 into this piece. I think in its current condition I could probably sell it for more than that, but I'm going to hang onto it for awhile for storage. It looks kinda awesome in the spare room.


What do you think?

Thanks for reading!

p.s. you can make these photos larger by clicking on them! take a look at the first one, especially, to see the years of damage that had built up.

linking up to: