Inspired by the 2012 animated short Paperman and all the flying machine party prep, I made this watercolor pencil art.
It happened to be ready weeks before Valentine's Day, too! I hope yours was lovely.
Tuesday, February 18, 2014
Thursday, February 6, 2014
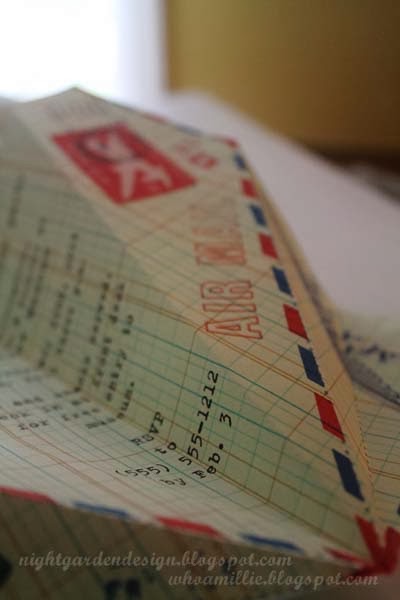
paper airplane party invitations
Printed on vintage accounting ledger paper.
Airmail graphics for label and stamp are from The Graphics Fairy,
and were printed separately on label paper and attached to the
airplanes like stamps. ("6 cents" was changed to "4 cents" in
Photoshop.)
Postmark
is a combination of several glyphs from a font called Dead Letter
Office available free from daFont, altered in Photoshop.
Text typeset in Helvetica (all caps, outlined) and Trixie.
I
had brainstormed ideas for invitations for my kiddo's Flying Machines
party and came up with the idea of a paper airplane invitation that
looked like Air Mail. A quick search revealed that it's not a unique
idea. Boo hiss. I used this design from Country Living Magazine as a template for my planes, although the result is pretty different.
If
you like these but don't want to invest the time to create your own,
please e-mail me. I can create a version with your child's name and
party details for a reasonable rate, with a 3-day turn-around.
Thanks for reading!
Saturday, February 1, 2014
chevron wedding quilt (part two)
Pinning the quilt (started this summer, last mentioned here in November, finished very recently), took a little more than four hours and seven hundred pins, which wasn't much considering I worried about how to do it for a month.
I pinned starting near the center, then towards the margins in quadrants, a pin in each seam and corner, and more along the edge.
Anyway, that's it for now. Anyone struggling with how, exactly, a gigantic, room-sized quilt gets pinned together in the middle of the night before a preschooler can ix-nay the ork-way, now has a bit of a heads-up, complete with nighttime photos.
I was lucky enough to have a more quilt-experienced friend to advise me to move my furniture and tape the backing to the floor super-taut. I used high-tack blue masking tape to stretch it a bit at a time, then layered and smoothed the batting and the top into place.
I pinned starting near the center, then towards the margins in quadrants, a pin in each seam and corner, and more along the edge.
Anyway, that's it for now. Anyone struggling with how, exactly, a gigantic, room-sized quilt gets pinned together in the middle of the night before a preschooler can ix-nay the ork-way, now has a bit of a heads-up, complete with nighttime photos.
More soon! Thanks for reading.
Subscribe to:
Comments (Atom)


