Showing posts with label garden. Show all posts

Thursday, August 8, 2013

what's up in the alley

There's an awkward area of our yard that's about six feet wide and borders the neighbors' property . . . where, in defiance of -- I don't know -- a million local building codes, they've built an addition about a foot away from the property line. It was there before we moved in, it'll be there after we leave. Unless the branches of our nut tree fall and crush it. I'd kinda love to see what kind of insurance claim would attempt to be filed on something like that.

Anyway, I digress. This awkward area of our yard is something I've ignored since moving in several years ago because: a) I'm an expert at avoiding things that drive me bananas; b) it's a very narrow area; and c) we had to break into our house through the fireplace one Fourth of July, and the alley has been full of rubble.

(That's a funny story; it starts with an unusable sixties-era fireplace separating from the foundation {Ha ha! Funny already, right?}. The plot thickens when we lock ourselves out of the house on a holiday weekend, then, to regain entry, bust through the decades-old brick and mortar with a sledge to the shock and awe of the house cats. Finally, in the conclusion, your intrepid hero and heroine patch up the wall and, eventually, re-side the entire house, but leave a pile of urbanite, pea gravel, concrete blocks and river stones in the alley. For a couple of years.)

It's a major unfinished project to just have laying around, and I started to finally tackle it because my kiddo is getting older and more exploratory, and I don't really want to leave him to the mercy of (possible) rubble-dwelling black widows and (possible) rusted nails from our roof replacement.

Here's a sneak peek, then, of some of the projects going on in the alley. My goal is to use mostly recycled materials and stuff we have on hand to beautify the alley and make it safer to traverse. This trellis, for example, is something I built using some cedar garden stakes from an estate sale (25 for $5!) and a busted extension ladder.


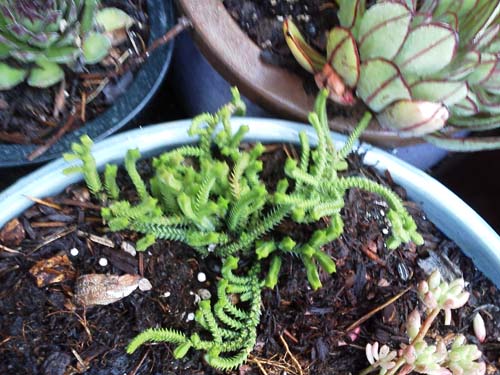
The raised beds are built of fireplace rubble ("urbanite") and filled with dirt from another spot in the yard, mulch from the city's Free Wood Chips pile, and plants from the local garden center's end-of season sale plant rack. I searched out shade-happy vining plants to help fill in that trellis.


And I made these planters out of a couple of old buckets and some split garden hoses.


There's a lot of work to do here still, but I'm feeling good that progress is happening. It was a scary, weedy, rubble-y mess that was in desperate need of attention . . . and now it's getting a little. I'll definitely be back with updates and details as this project progresses as it's far from finished; I have so many ideas! So much to do before the weather turns! So much stuff for my kiddo to get into while I'm slaving away in the alley! What about you? Are you trying to make something out of nothing this summer, too?

Thanks for reading.

p.s. Hey! You can make these images larger just by clicking on them, but you probably already knew that, clever you.

Wednesday, May 8, 2013

pinterest challenge: backyard arbor


At last, it's time to show you a little more about this teaser photo I showed at the end of my last post:


Of the many pins on my Curb Appeal Pinterest board, most are variations on the pergola/arbor/garden arch theme. I've been collecting ideas for nearly two years now. 


In front of my house, I have two random metal garden arches (in different styles) that came to me on sale from a couple of different places. In the backyard, the "arch" in front of the studio building (which is now mostly sided! Hooray!) looked like this:


Urgh. The green metal arch (can you even see it?) is a leftover craft store "wedding arch" from our wedding ten years ago. It was clearly not meant for heavy labor.

I had it pretty neatly disguised for awhile with twigs and branches woven in. A windstorm collapsed the whole thing last year. 

I then had it supported by the side supports of a pergola that had also collapsed in the windstorm . . . total eyesore. That part had been removed by the time I thought to take this photo, along with a lot of the sticks and weeds.


Yes, I'm embarrassed that things got to this neglected, overgrown state. That's life in a fixer-upper, folks. Some things get fixed-up faster than others.

Which explains all of those arbor pins on my pin board, and my burning desire to take care of the issue.

This project was uploaded to Instructables by someone calling himself/herself SpecialK, who deserves the credit for this photo. And it's the project I decided I could take on, by myself, before my husband came home from work one day last week.


So, that didn't exactly work out. I did have it about 90% built by the time the mister rolled up that evening (just needed cross bars and lattice on top and sides), but in my eagerness to get to building, I built it out of place. This presents some challenges I hadn't properly anticipated, like, say, assembling the thing with only one adult present, and moving it, and keeping things square and level. But let's set that aside, and assume that you'll do things the EASIER way: holes first, arbor built in place.


I finished it up the next afternoon (with some help from my kiddo and his toy drill) and started measuring for and digging the holes for the legs.


After the mister helped me finish digging with the post hole digger (approximately 15 inches deep), I put some pea gravel in the bottom of each hole (approximately 3 inches worth) and we finagled the arch into place, working until it was in-line with the roofline of the studio.


The bottoms of the legs are coated with spray-on rubber sealant about 18-inches along the bottom and sides. They are made of Douglas Fir, which needs a little insect and rot resistance. The gravel is for drainage as well as anchoring. I filled around the legs with some more pea gravel, and finally some larger river rocks near the top to disguise the sealant and to keep dirt away.


I also trimmed back the rose and grape vines a ton, which hurt to do. The rose will grow back quickly, but that grape vine takes awhile, and it really only started producing mass amounts of grapes last year. Fingers crossed that it snaps back. 

The next step was to paint. I had some oil-based primer left from ye olden days (maybe we used it on the pickets in the front yard?). Had I used all cedar or all pressure-treated wood, I would have kept it wood-colored, but I used a variety of woods and thought a little paint protection would go a long way.


The original project parameters call for pressure treated wood and store-bought lattice, and estimate the cost at about $100. I have three of these to build (this is the first) so I wanted to bring in my practice arch at closer to $50.

Here in Oregon, 8-foot 4x4 Douglas Fir posts are about $7 apiece. I used a mix of recycled shipping timbers (79 cents) and utility grade 1x2s ($1.50 for an 8-foot length) for the side supports, horizontal lattice,  and crosspieces on the top. The long skinny pieces on the side lattice are 6-foot long cedar garden stakes I already had on-hand.


The front and back pieces at the top are made from 1x6x6 clear grade cedar fence boards for $3 each.


I came in under my $50 target thanks to the river rocks, screws, and paint I already had on hand, as well as using utility grade lumber and a few on-hand and recycled bits. I'm sure that (free) pallet wood could stand in for most of the pieces here, too, so it's entirely possible to build one for even less (in fact, over on my Curb Appeal Pinterest board, there's a link to a plan for a pallet wood arch that's kid-sized).

I'll have more for you later, as the path gets re-done and the garden beds get rebuilt (I'm thinking cement retaining wall blocks this time around), so check back later in the summer!

In the meantime, thanks for reading the latest in my series of posts for the Young House Love / Bower Power Pinterest Challenge! Head on over and link up if you've finished a project inspired by Pinterest, too.

Linking up to:


Wednesday, May 1, 2013

out in the yard


We've been planting up a bunch of succulents in a collection of random planters out back. I like their drought tolerance, although the no-rain season here in the Northwest always comes kinda late. When it hits, I always lose plants, especially when I plant in planters. Hopefully, planting these guys will cure that problem.


The grass is a little long here; I photographed this area before the first mow of the season (I don't like to mow when the grass is wet because it dulls the blade more quickly and clogs the underside of the mower). Also, a lot of the grass isn't grass anymore; we seeded a bunch of clover and, as happens every year, the dandelions just volunteer.


You can spy a little of our next planting project in this one; the little nursery pots in the background are seeded with grey stripe sunflower seeds and rouge vif d'etampes pumpkins (the Cinderella-looking ones found here).


And, because we've had a spate of decent weather lately, we actually got out and resumed our siding project on the studio walls. I doubt you'll remember this entry from 2008, when we did the cedar shingles at the peak. Yeah, so the studio's just been sitting there in all its tar-papered glory, looking more and more stupid as we've sided and painted the house, and put in the patio, and built the garden beds . . .  I'm super-excited to have gotten this side, plus the entire back and most of the other side done in one weekend. Since this time, we've also finished more than half of the front. Just a little more work to do, and it'll finally match the house and the shed! I'm pretty happy to be able to get this crossed off our list. It's been a long time coming.


Again, the lawn hadn't been mowed yet, and the raised beds hadn't been weeded, but I'm going to wait to show you those updates when I show you more of this in a couple of days . . . 


Because by some luck, I built the whole thing in a couple of afternoons in the backyard, just in time for the spring Pinterest Challenge over at Young House Love and Bower Power. And I'm looking forward to sharing it with you.


This spring is a strange one. Outside, so many things are just beginning, springing to new life. Yesterday, though, a friend and adviser passed away suddenly. It feels out of sync, and unreal in such a green season. He's already so missed from this world.


Thanks for reading. 

Wednesday, February 27, 2013

pinterest challenge: vertical hanging planter

Pinterest, I've said it before and I'll say it again: you'll be the death of me.

On the other hand, I'm lucky enough to get to participate in the Young House Love/Bower Power Blog completely unauthorized Pinterest Challenge because of you, so maybe it's a draw?


Okay, fine. I love Pinterest. I've found it an endless source of inspiration and ideas. The only trouble I have is in distilling the content; I want to do everything. Like vertical gardening, for example. Wall pockets, hanging planters, cinder blocks, you name it, I want to make it.


original pin here
inspiration board dedicated to vertical and hanging planters and gardens here


Distill! Distill!

I took all those inspirational images and tutorials and made this: an upcycled wall planter homage to wall gardens. It wasn't exactly free, but it was pretty inexpensive, and mostly used materials (and plants) I already had on hand.


Materials:

Old iron planter basket (sans chains)
soil
pine shavings
hardware cloth or chicken wire remnant
awning remnant
hens & chicks
wire
thyme
heavy coat hook 

Get an old iron planter basket (mine cost $2 at Bring). You'll need to acquire this first, as you'll use it to determine how large to cut your burlap and hardware cloth. You could also use an old bicycle wheel; one of the pins above makes a spinning planter with one. (Note: Bring marks prices with a paint pen; I've had good luck removing their prices with a Magic Eraser.)


After testing placement, replace your chintzy picture hanging hook with a nice, sturdy coat hook.


Sew a "pillow" from old coffee sack burlap, using twine pulled from the sack to sew it up. Turn it inside out and fill with a mixture of potting mix and pine shavings (to make it more lightweight).


Stitch the pillow closed and stuff it into your planter basket.


Cut some hardware cloth to the approximate size and shape of your container's back using tin snips. I had a large piece leftover from an old playhouse we tore down awhile back; chicken wire would work well, too. Cutting it down to an approximate size first makes it easier to work with when you're ready to do more exact cuts later.


Set aside your hardware cloth for the next step.

If you'll be hanging your vertical wall planter on a surface you want to protect marginally, you should add a waterproof layer so that the dirt and water don't soak through the burlap, causing stains and rot. You can use an old piece of tarp, or one of those poly pet food bags, or (like me) a piece of an awning destroyed in a windstorm. Cut it out and place it on top of your dirt pillow.


Trim down the hardware cloth to fit, then tuck it in place over the waterproof layer and use wire and some needle nose pliers to attach it to the basket.


Turn the pod over and lay it flat to begin filling in your plants. 


I trimmed some of my hens & chicks plants down, and also added a divided thyme seedling and a whole lotta moss. (We'll see what survives!)


Poke or cut holes in the burlap and thread roots or runners into the holes.


 Fill in around plants with moss.


I hung mine up right away for photos, but pretty much universally, it's agreed you should water it and leave it flat for a couple of weeks to allow the plants to take root. So after taking some pictures, I took the planter down again and laid it flat to do exactly that.


Patience is a virtue.

Thanks for reading, and thanks to Sherry and Katie for issuing the Pinterest Challenge! It's always good to have the chance to mark a project off my list . . . especially one that first caught my attention over a year ago. 

Linking up to: